Creating an "On Call" Light with Toggl and Home Assistant
For years I have relied on Toggl Track to track where my time is being used and stay focused while working. As part of this I categorise my work items using tags such as “doing,” “supporting,” and “meeting”. I started doing this to help me reflect on how much time I am spending in different areas and try to ensure I have a balance.
At the moment I usually split my work week between a couple of days in the office and the remainder at home. There are other people in my home, however, and if I’m not talking on a call it can be hard to tell from outside my office if I’m on a call or not - so it was time to work out how to combine this Toggl time tracking with a “On Call” indicator.
There are a few moving parts to this
- Software
- Toggl Track - I use the free plan currently (although they have just recently announced some changes to their usage limits for APIs and Web Hooks - hopefully I’m still under the limits, but time will tell)
- Home Assistant - I use this for all my home automation, so it would seem a natural place to add this “On Call” automation
- Home Assistant Cloud - Nabu Casa - I subscribe to this to help fund the development of Home Assistant. It has a couple of added benefits like making Alexa integration easier as well as Web Hooks (which we’ll use later). This is not required to get any of these features working, it just makes it easier and moves it to being a managed service as opposed to something I need to configure and maintain myself
- Hardware
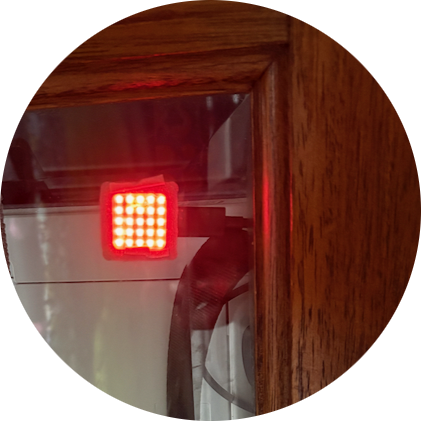
- M5Stack ATOM Matrix ESP32 Development Kit - I had one of these lying around that I had purchased because it looked interesting then never found a use for it. It is an ESP32 based device including an addressable 5x5 LED display. Any smart light with colour control would suit this automation, this is just what I had on hand. My ESPHome configuration for this device is available here.
The Setup
The core pieces we need to configure are:
- A few Input Helpers in Home Assistant to hold our state
- A Home Assistant automation that is configured to take input from a Web Hook A second Home Assistant automation that is configured to respond to the state parsed from the Web Hook input
- A script to configure Toggl with the Web Hook destination
Input Helpers
In Settings → Devices & Services → Helpers I have configured 4 input helpers. I am showing the YAML here as it is easier to show the configuration in this format, and should be easy enough to configure the UI with the same values.
input_text:
  toggl_task_name:
    name: Toggl Task Name
    max: 100

input_number:
  toggl_task_duration_min:
    name: Toggl Task Duration (min)
    min: 0
    max: 1440
    step: 1

input_boolean:
  toggl_task_running:
    name: Toggl Task Running

  toggl_task_meeting:
    name: Toggl Task Meeting
Automation for Webhook Handler
In Settings → Automations & Scenes → Automations create a new automation and as the Trigger select the “Webhook” option. Click the settings cog next to the newly created web hook ID and be sure to unselect the “Only accessible from the Local Network” option.
Once that is created you can use the remainder of this automation template (you should continue to use the unique identifier the previous step generated).
This will:
- Parse the payload to determine:
- if a timer is current running
- if the tags for the running item contain “meeting”
- the current duration
- the name of the task
- Update the state of the 4 input helpers based on this parsed information
Automation for Light Control
This automation is configured to be triggered by changes to the “Toggl Task Running” Input Helper and conditionally turn on and off the light. If the current task is a meeting, the light will be red, otherwise it is green (to indicate I’m working on a task, but can be distracted if needed).
Configuring the Toggl Web Hook
The last piece in the puzzle is telling Toggl about your web hook configured in Home Assistant. For this I called the Toggl API using cURL.
curl -X POST https://api.track.toggl.com/api/v9/workspaces/<your workspace id>/webhooks \
  -u "<your API key>:api_token" \
  -H "Content-Type: application/json" \
  -d '{
        "url": "https://hooks.nabu.casa/<your webhook id>"
      }'
There are three placeholders in this command that you need to fill in with your own values.
- Log in to Toggl and go to Settings. In the URL after
track.toggl.comthere will be a number - that is your workspace ID. - Navigate to your Profile Settings and scroll down to near the bottom where you will find an API Token section. This is where you can reveal and/or regenerate an API token
- In Home Assistant, go to Settings → Home Assistant Cloud and scroll down to the Webhooks section at the bottom. Find the item for the automation we created and click Manage. Here you can copy your webhook URL.
The Finished Product
So now I have a little light on the glass of my door that shows if I’m on a call or not. It’s something I’ve been meaning to do for a while, but just never quite got around to it until now.
